Create a competition
Create the competition
Section titled “Create the competition”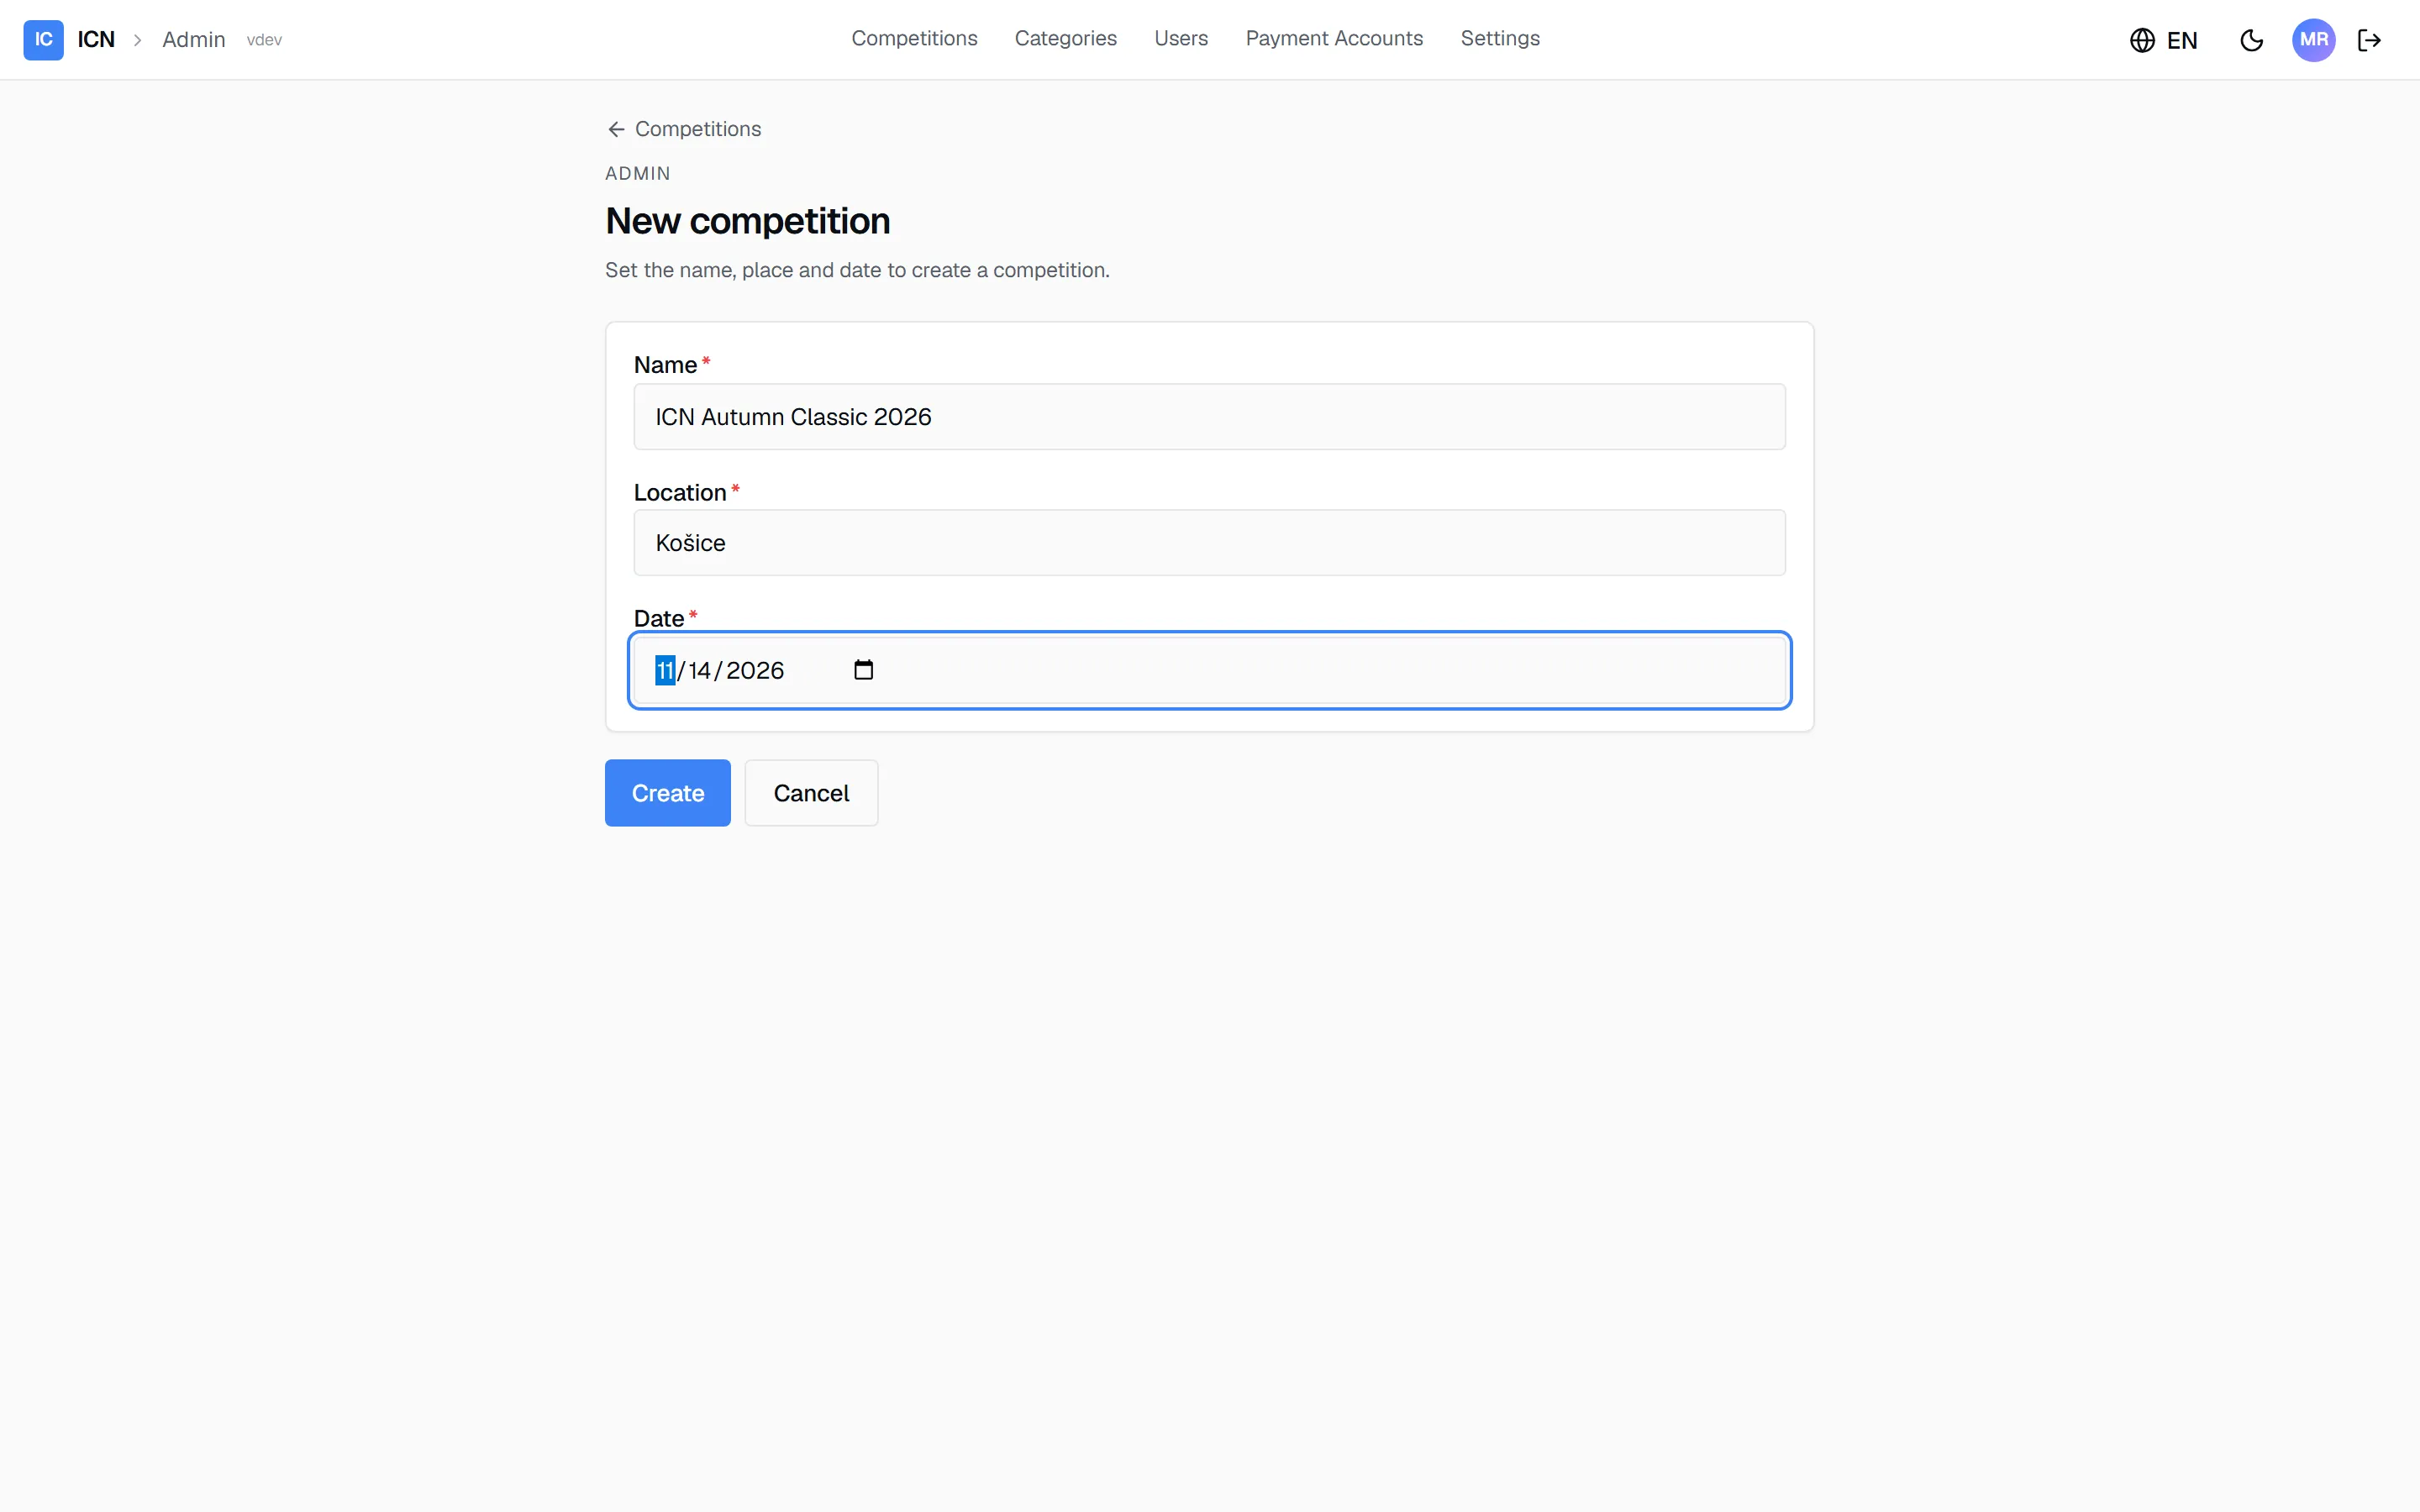
- On the dashboard, click New competition.
- Fill in Name, Location, and Date.
- Click Create.
The competition is created in Created status with the standard entry-fee services already configured (see Registrations, fees & payments). Name, location, and date stay editable under Basic Information.
The competition workspace
Section titled “The competition workspace”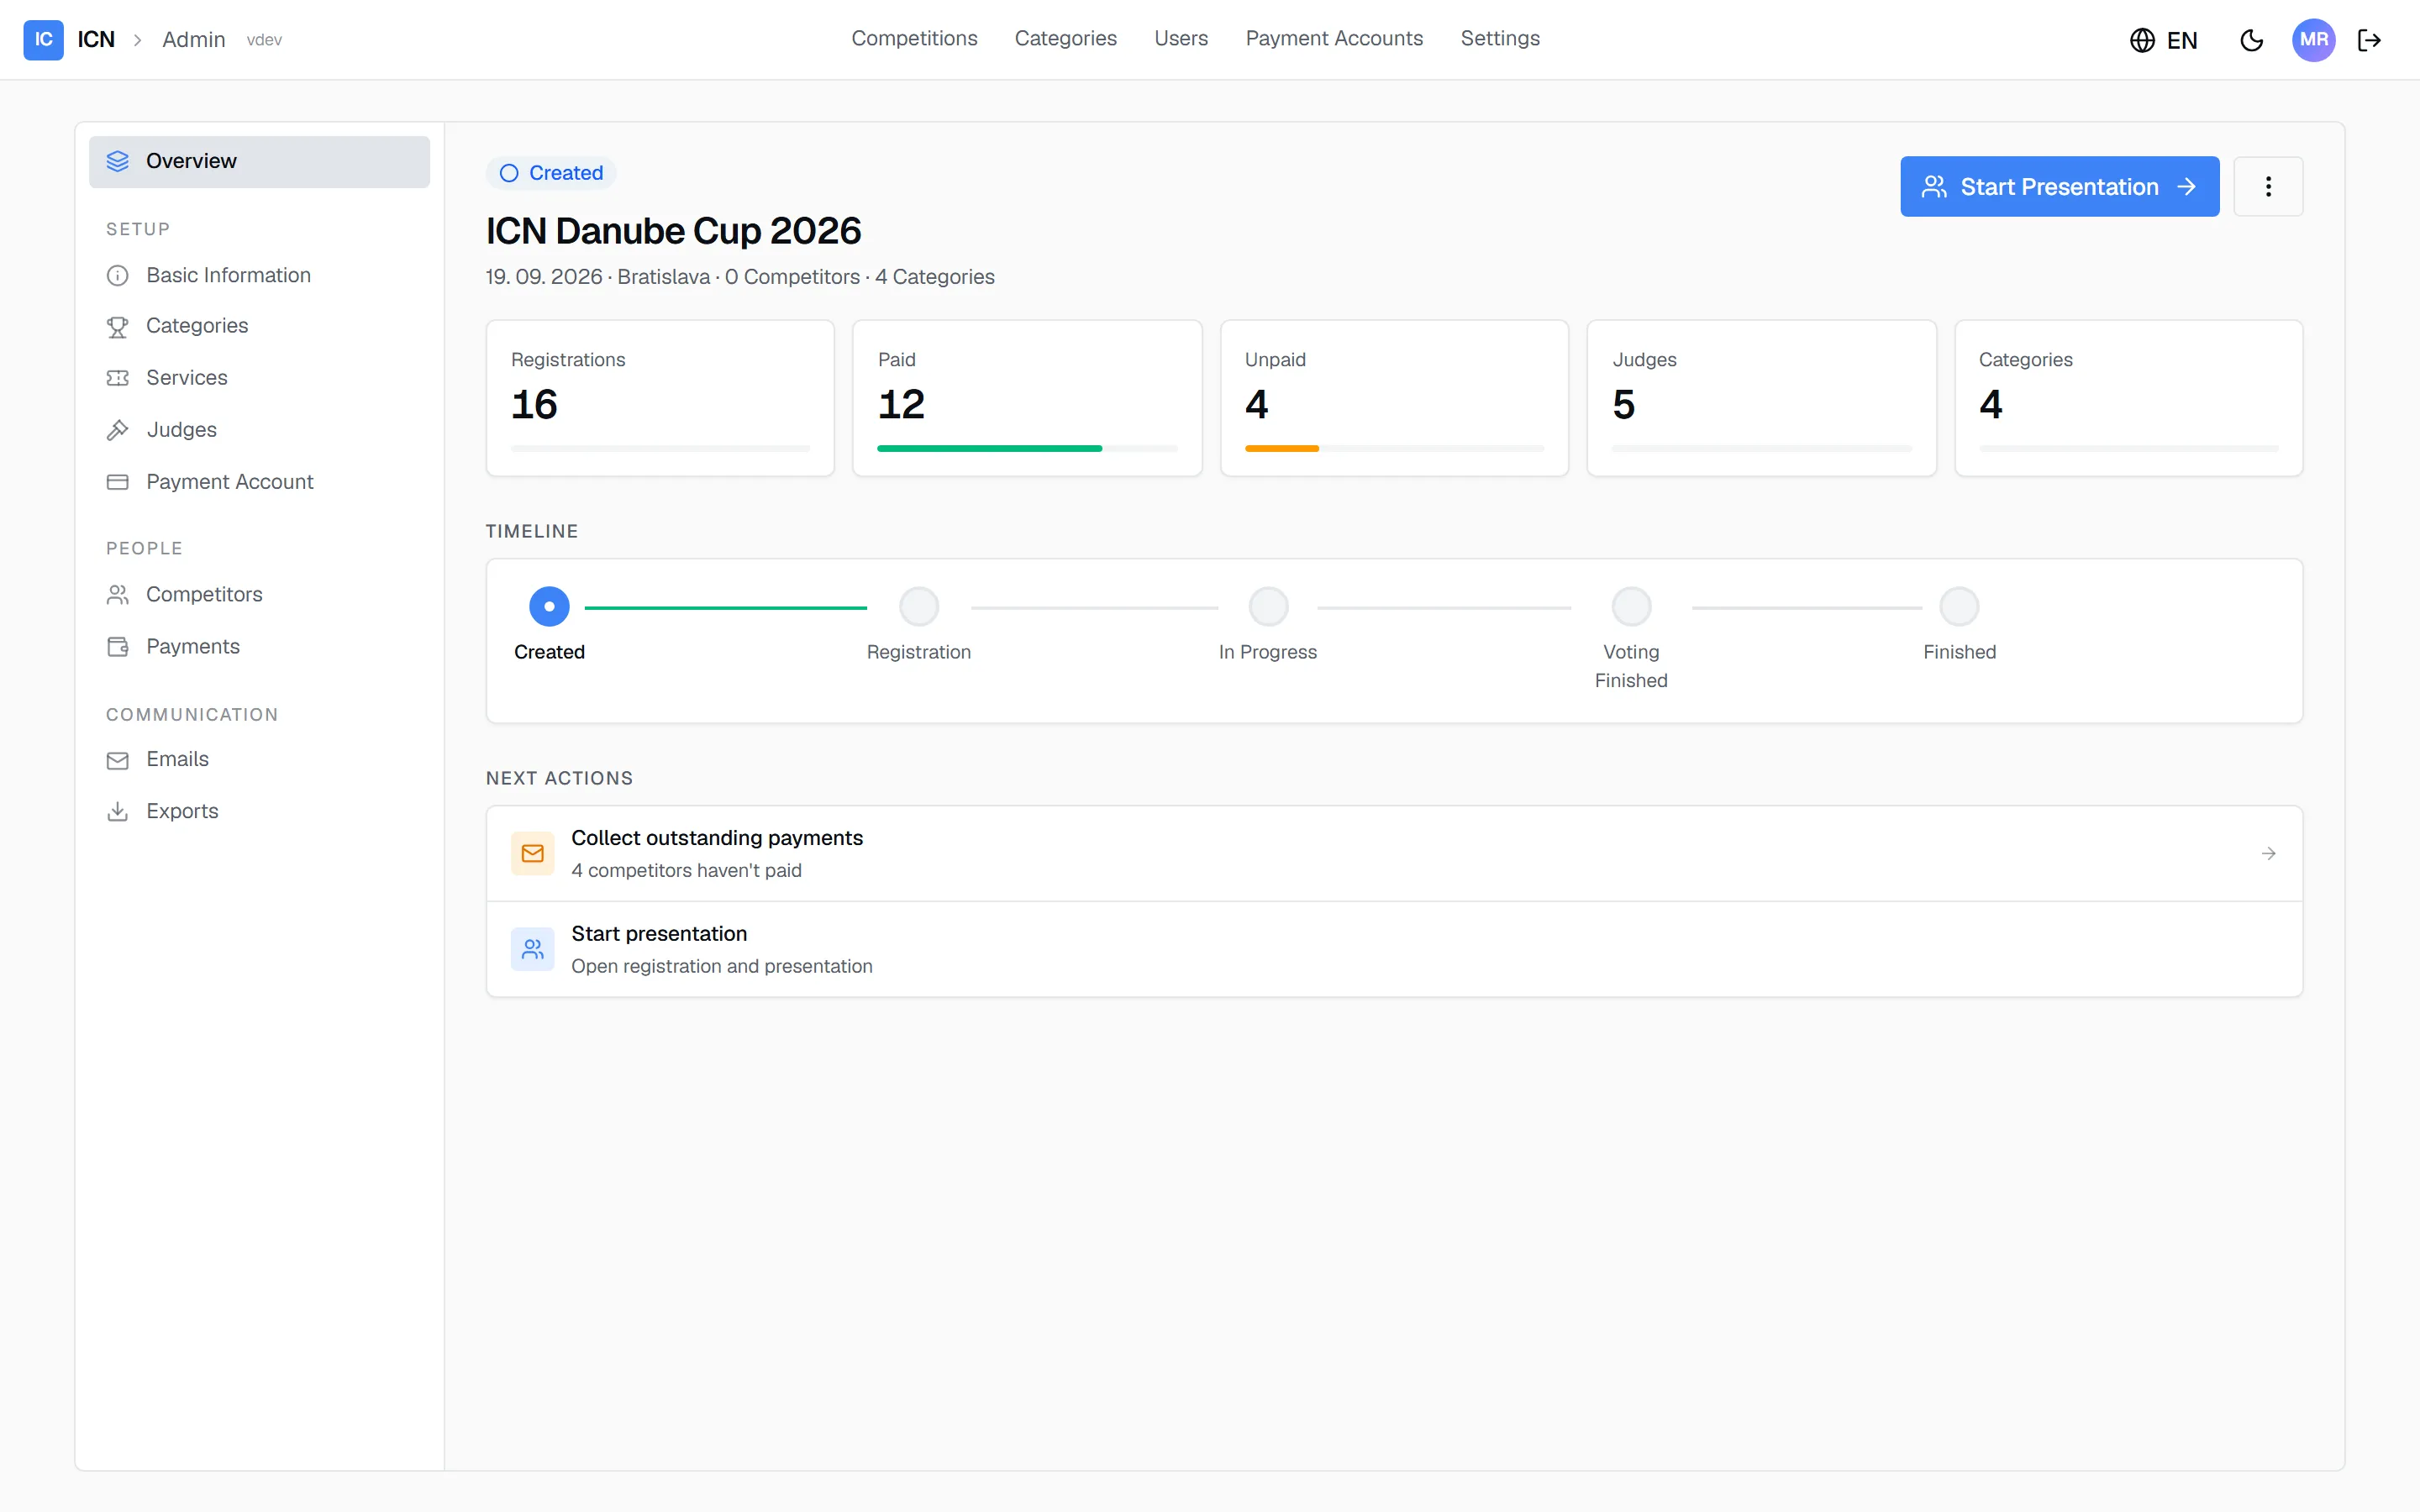
Opening a competition takes you to its workspace. The left rail groups everything:
- Overview: registration and payment counters, the lifecycle timeline, and a Next actions list, for example Collect outstanding payments or Start presentation.
- Setup: Basic Information, Categories, Services, Judges, Payment Account.
- People: Competitors and Payments.
- Communication: Emails and Exports.
- Results appears once voting has finished.
Two things in the header matter on every visit. The status badge next to the name shows where the competition stands: Created, Registration, In Progress, Voting Finished, Finished. The primary action button, top right, always offers the next lifecycle step; for a draft that is Start Presentation, used in Competition day.
Basic information and payment account
Section titled “Basic information and payment account”Basic Information edits the name, location, and date. Payment Account selects the bank account competitors pay entry fees to; payment QR codes and payment matching use it.
Guide version 1.0.11(sha-d88f0fe)